(一) signal source description
The description of the SSID of the wireless network signal on the campus of Taipei University is as follows:
(1), NTPU: general website login on campus
(2), NTPU_5G: general website login on campus
(3), NTPU-int: Login to the International Conference Hall of Business Studies on campus
(4) TANetRoaming: domestic inter-school roaming, web login
(5), NTPU-802.1x: On-campus account login, encrypted connection
(6) Eduroam: international roaming, encrypted connection
Among them, Eduroam is a plan to establish a wireless local area network roaming system among international educational and scientific research institutions, which is intended to promote the sharing of wireless local area network services among global education and scientific research institutions. For details, please refer to: eduroam roaming information.
Note: SSID is the abbreviation of Service Set Identifier. Public wireless network base stations will set more than one SSID name for user identification.
(二)signal coverage description
(1), Taipei Minsheng Campus
1. Teaching Building: Part B1 covers the whole area from the 1st floor to the 5th floor.
2. Information Building: Fully covered.
3. Gym: fully covered.
(2), Taipei Jianguo Campus
1. Ziqiang Building: The open classrooms on the 1st floor are completely covered.
2. Zhuangjing Building: The open classrooms on the 1st floor are completely covered.
3. Social Science Museum: The second floor is fully covered.
(3) Three Gorges Campus
1. Humanities Building: B1 to 4th floor open classrooms, 1st floor conference hall and 5th to 8th floors are fully covered.
2. Business building: B1 store, community area and open classrooms, open classrooms and conference rooms from the 1st to the 3rd floor and the 5th floor are fully covered.
3. Administration Building: Fully covered.
4. Social Science Building: Fully covered.
5. Law Building: Fully covered.
6. Public Affairs Building: Fully covered.
7. Graphics Building: Fully covered.
8. Sports venues: Some areas from Floor B1 to Floor 1 are covered.
9. Chong Yue Pavilion: fully covered.
10. Comprehensive gymnasium and activity center: fully covered.
11. Rhythm Motor Information Building: fully covered.
12. Wood Art Classroom: Fully covered.
(三) Login Account Description
(1), the school staff and students
1. "Faculty and Staff": Please use the "Faculty and Staff Email Account Password" to log in.
2. "Students, alumni who have applied for an alumni card": Please use the "student email account password" to log in. (Example: s410012565)
(2) Outsiders
To become a member of the "Inter-School Roaming Program", please log in with the "full account and password of the original unit". (Example: abc@XXX.edu.tw, abc is the account number, XXX is the original unit information)
(四) Login Method Description
(1) use browser method(web) to log in
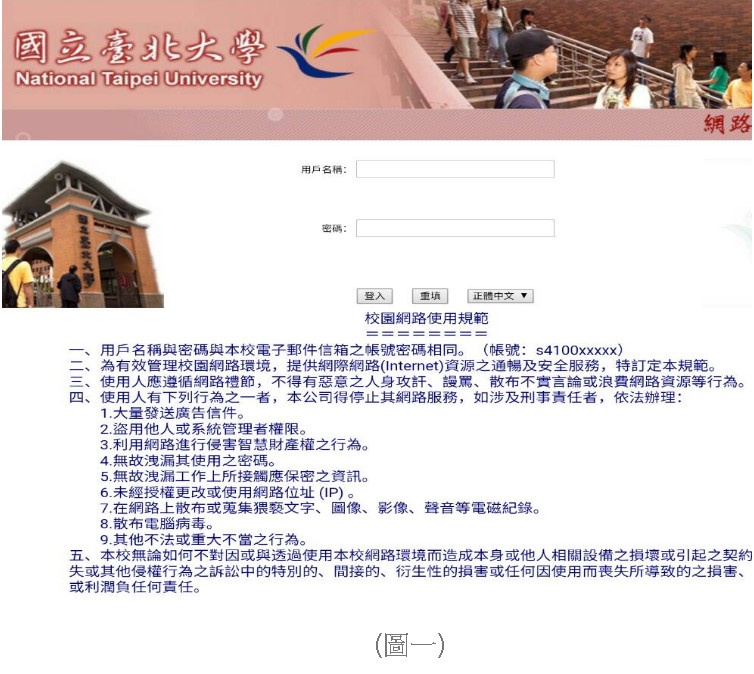
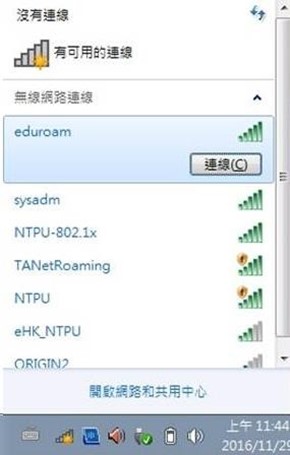
1. Taipei Minsheng and Jianguo Campus (SSID:NTPU and TANetRoaming):
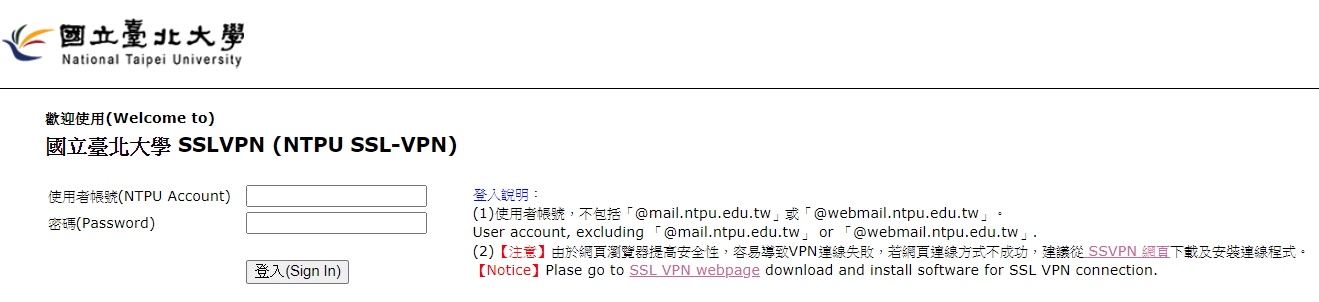
After searching for NTPU and TANetRoaming base station and connecting, the web page will be automatically opened and the authentication screen will appear (as shown in Figure 1). html.
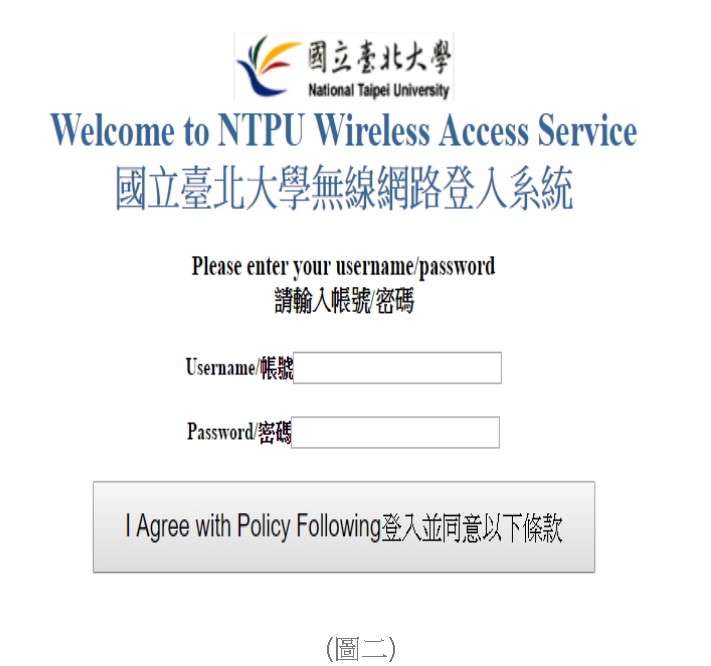
2. Sanxia Campus (SSID: NTPU, NTPU_5G)
After searching for SSID: NTPU or NTPU_5G and connecting, the authentication screen will appear when the webpage is automatically opened (as shown in Figure 2); if the browser is not automatically opened, please open the browser manually and enter the URL: https://1.1.1.1/fs/ customwebauth/login.html ..
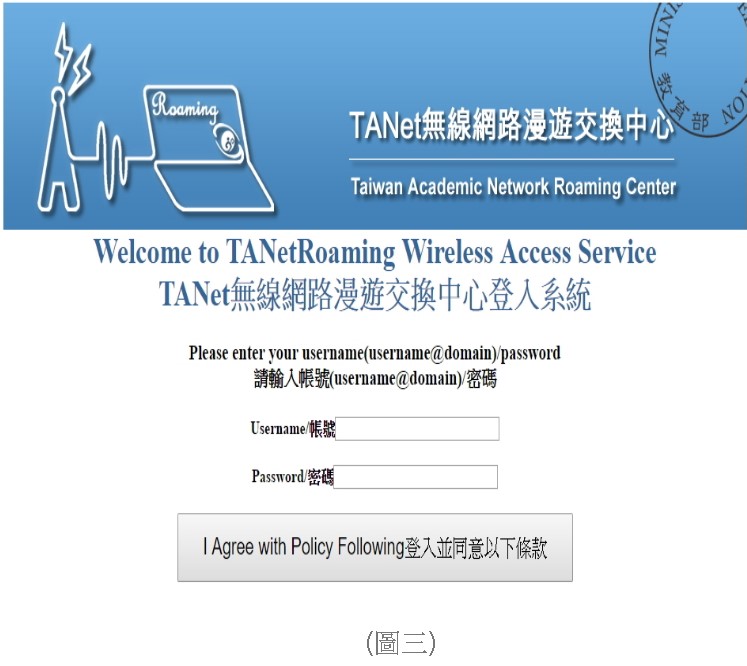
3. Sanxia Campus (SSID: TANetRoaming)
Search for SSID: TANetRoaming and connect, and the authentication screen will appear when the webpage is automatically opened (as shown in Figure 3). If the browser is not automatically opened, please open the browser manually and enter the URL: https://1.1.1.1/fs/customwebauth/ login_tanet.html .
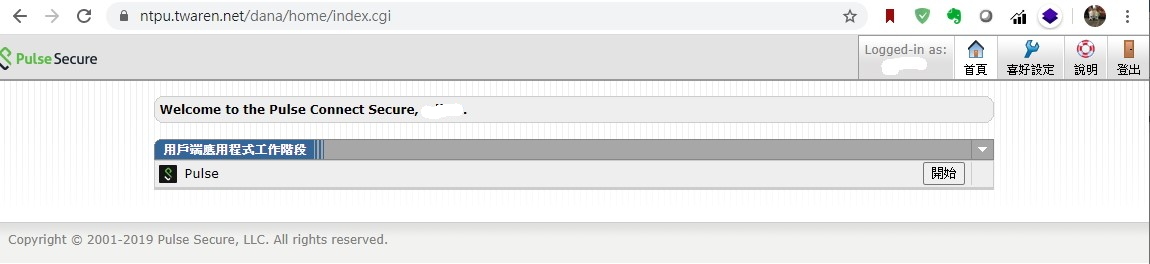
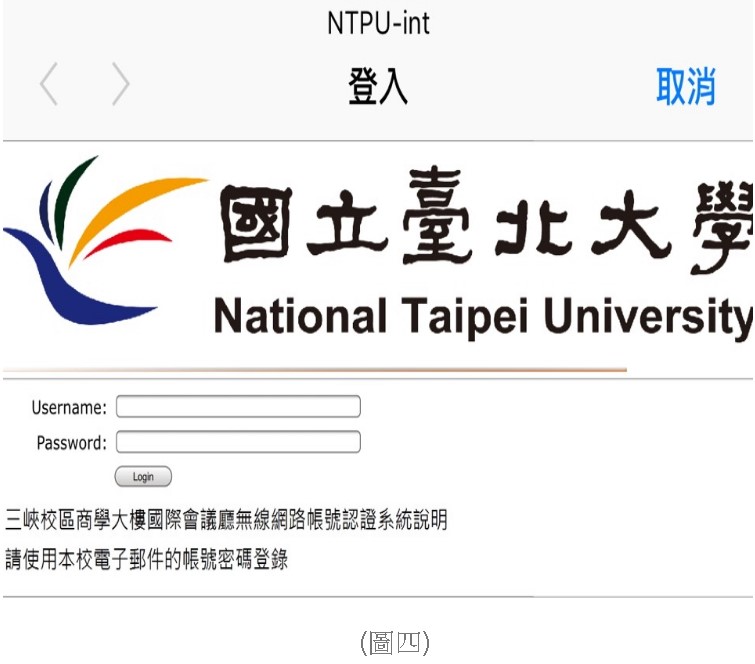
 4.International Conference Hall, Business Building, Sanxia Campus (SSID:NTPU-int)
After searching for the NTPU-int base station and connecting to it, the webpage will be automatically opened and the authentication screen will appear (as shown in Figure 4).
(2) use 802.1x authentication to log in
Currently, only the map building area of Sanxia Campus and the teaching building area of Taipei Campus are open for use
Use NTPU-802.1x or eduroam base station to encrypt the connection, according to the use of different devices, the instructions are as follows:
※Note: Do not use other people's computers or handheld devices to log in to your own account and password.
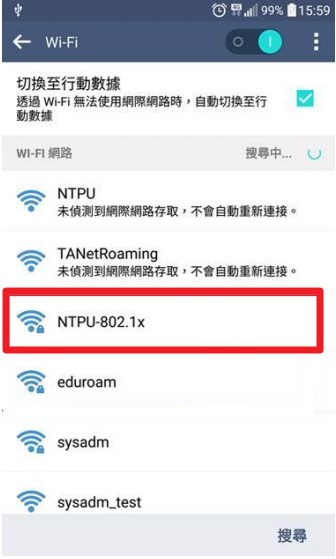
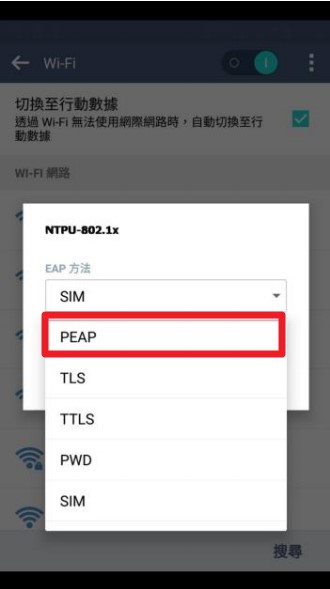
1. Instructions for connecting the NTPU-802.1x to the Android system
(1). Open "Settings" -> enable Wi-Fi and click NTPU-802.1x
(2). Select "PEAP" for "EPA Method"
(3). Enter the school email account and password
For student status, please enter student email account and password; for faculty and staff, please enter faculty email account and password
Example: s10012345 (student email account), abc (faculty and staff email account)

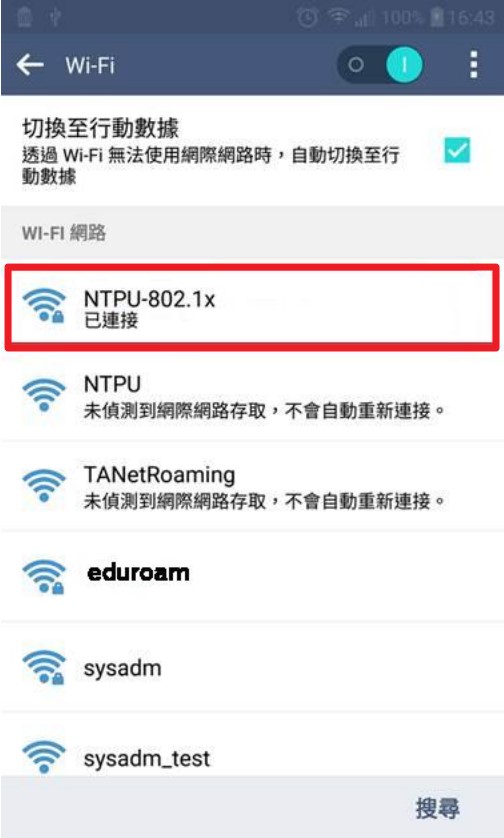
(4). The status of NTPU-802.1x is displayed as connected, indicating that the connection is successful, and you can connect to the Internet.
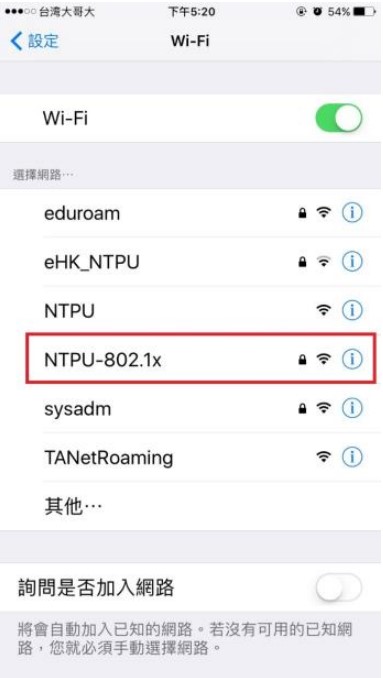
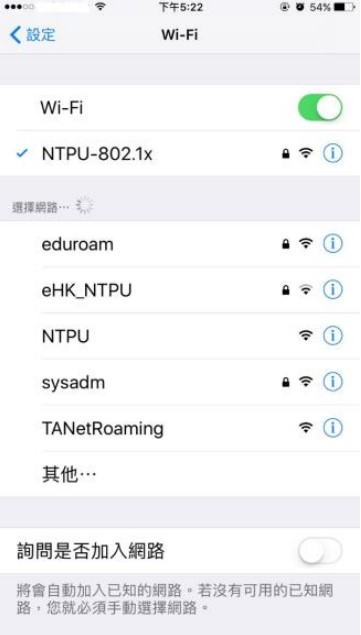
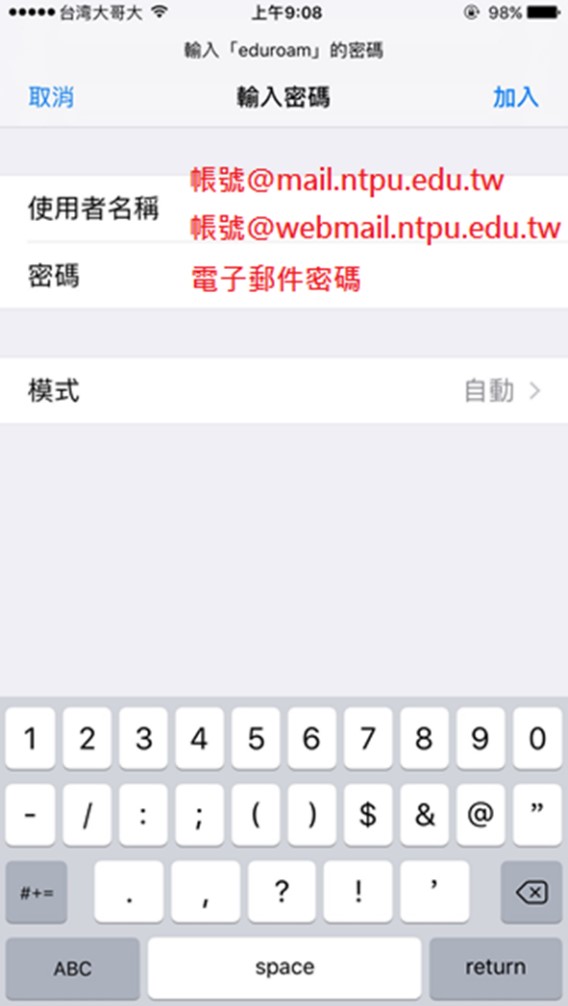
2. Instructions for connecting the NTPU-802.1x to the iOS system
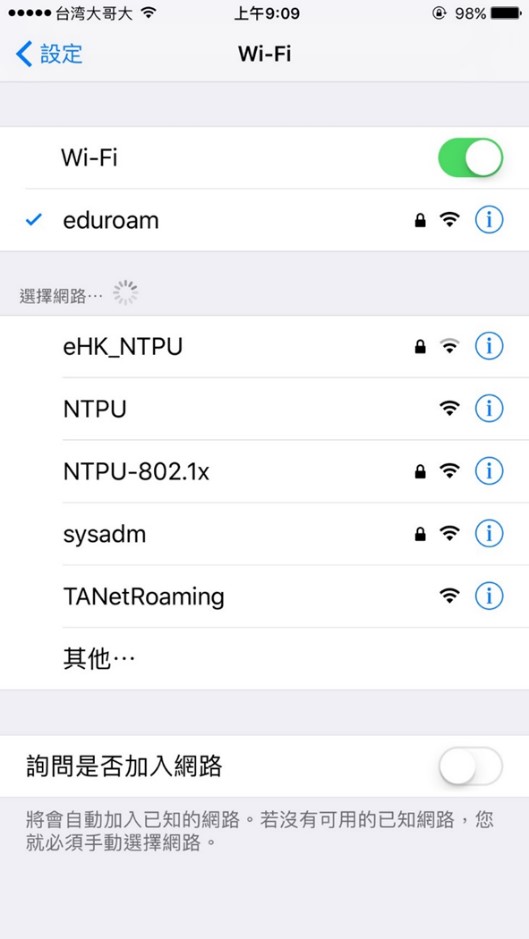
(1). Open "Settings" -> enable Wi-Fi and click NTPU-802.1x
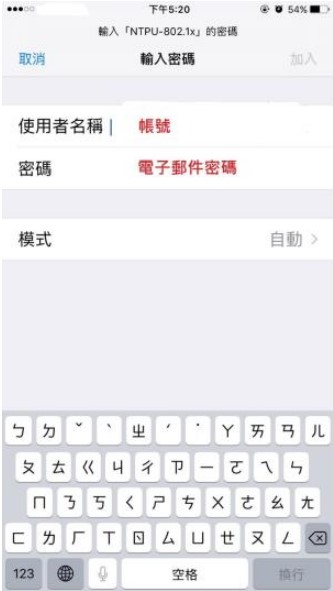
(2). Enter our school email account and password
For student status, please enter student email account and password; for faculty and staff, please enter faculty email account and password
Example: s10012345 (student email account), abc (faculty and staff email account)
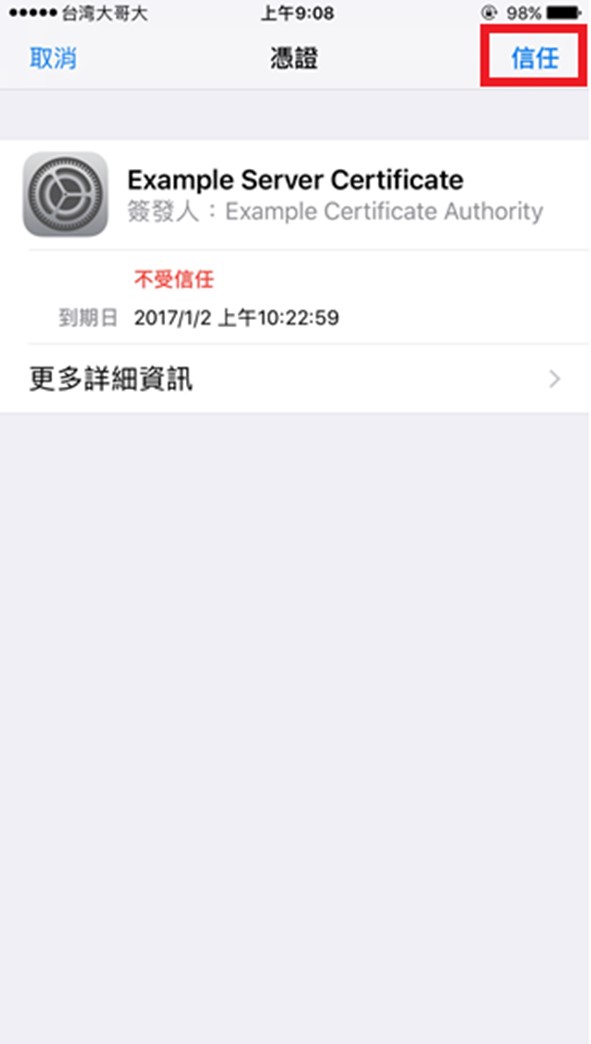
(3). The certificate message appears, click Trust.
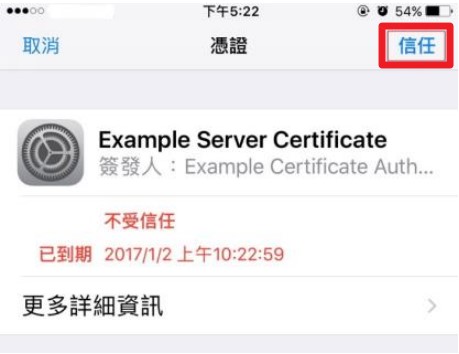
(4). After completing the authentication, you can connect to the Internet.
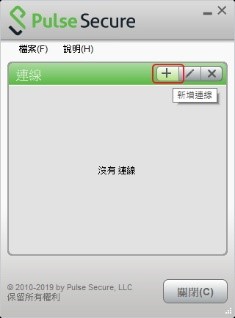
3. Operating instructions for connecting NTPU-802.1x to Windows 7 and 8 systems
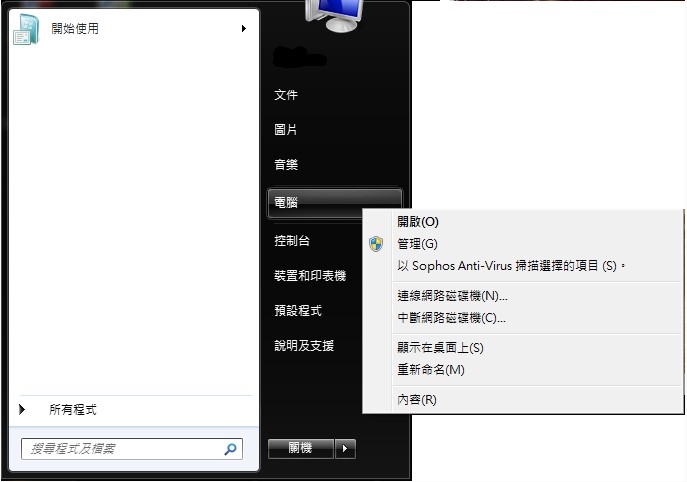
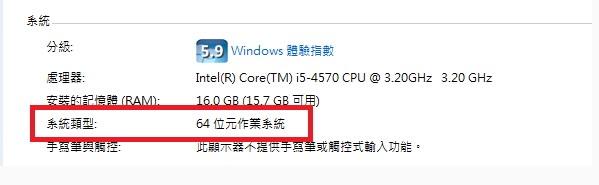
(1). The user must first check the version and bit size of the computer
Step 1. Console → System and Security → System
Step 2. Check the Windows version and system type as 32-bit operating system or 64-bit operating system
(2). Download the EAP-GTC installation file
(3). Install the EAP-GTC installation file
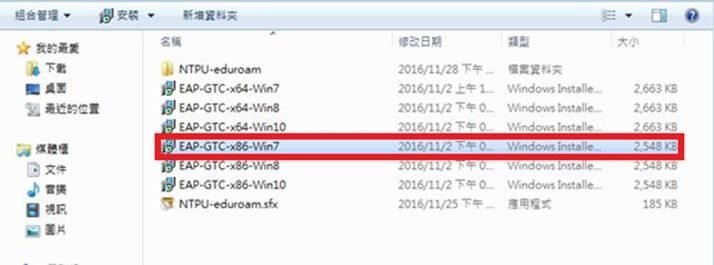
The following takes Windows 7, 32-bit operating system environment as an example.
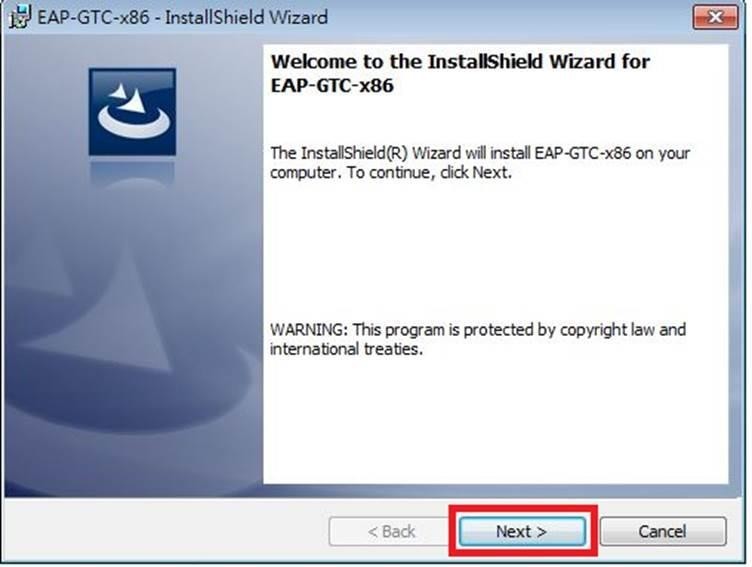
Step 1. Download and install "EAP-GTC-x86-Win7".
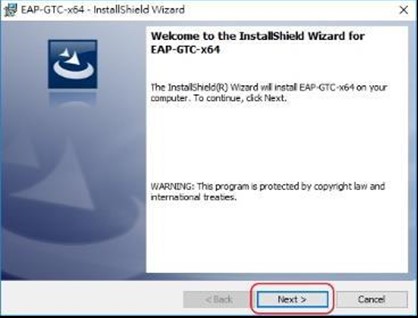
Step 2. After the installation file is executed, this screen appears, click "Next".

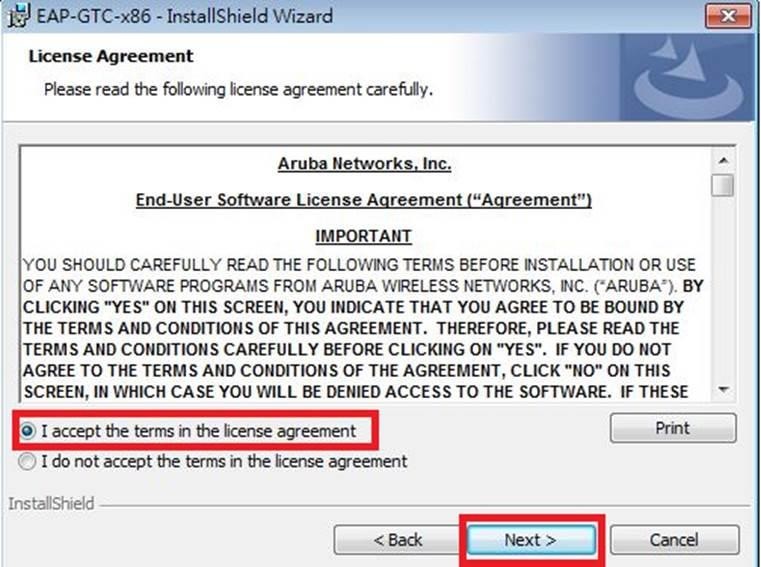
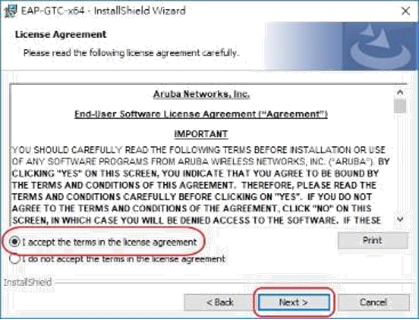
Step 3. Select "I accept the terms in the license agreement", and then click "Next".
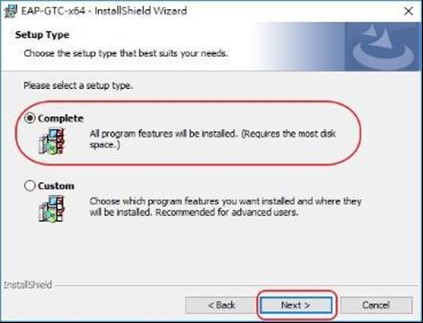
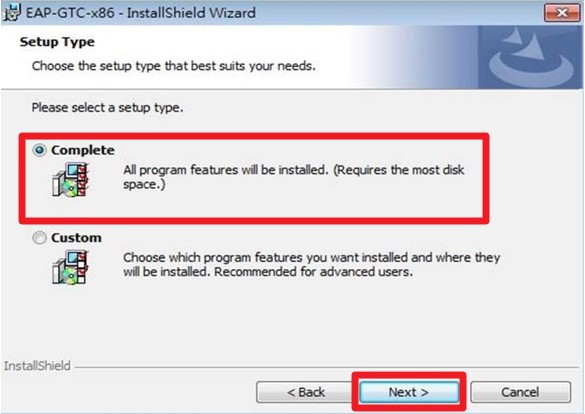
Step 4. Select "Complete" and click "Next".

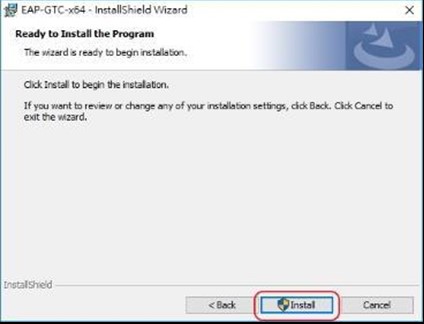
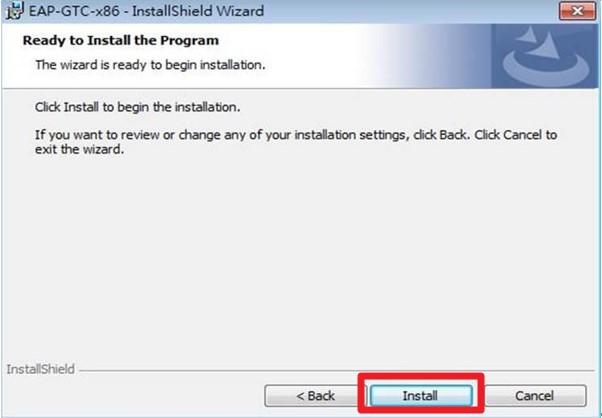
Step 5. Click "Install".

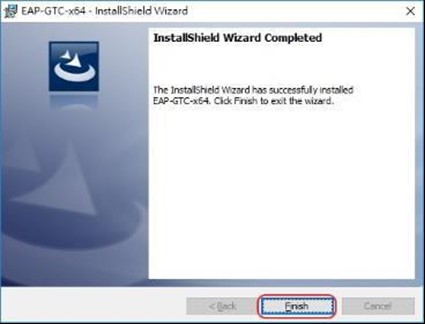
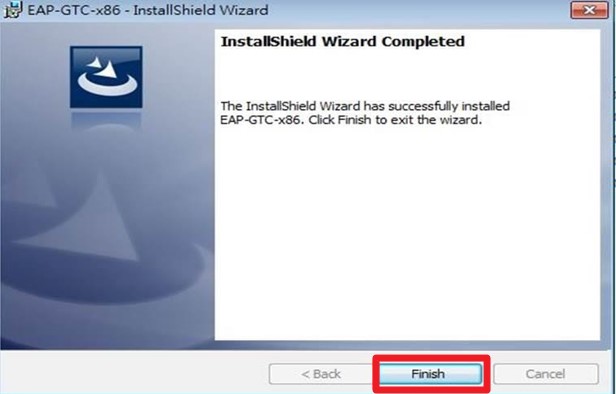
Step 6. The installation is successful, click "Finish".

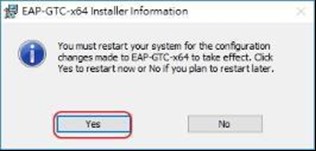
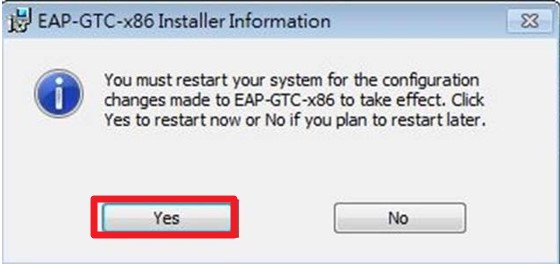
Step 7. Select "Yes" and wait for the reboot to complete.

(4). Setting the wireless base station
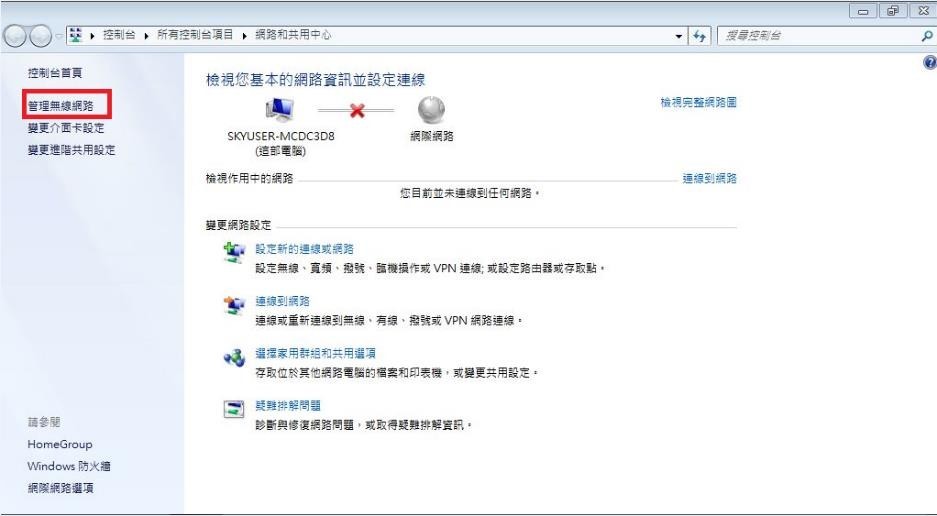
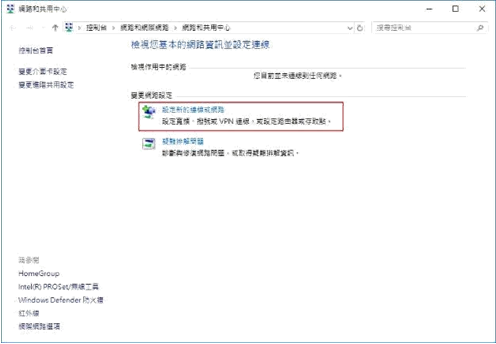
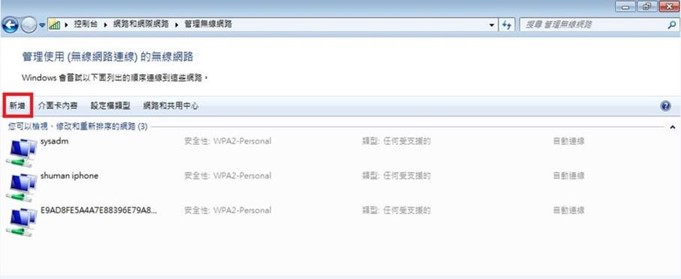
Step 1. Go to "Control Panel" → "Network and Internet" → "Network and Sharing Center", and click "Manage Wireless Networks".
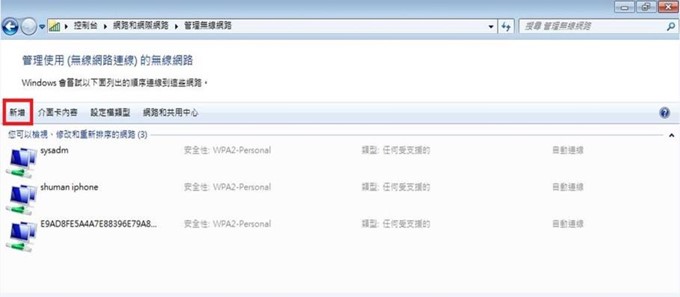
Step 2. Click "Add".
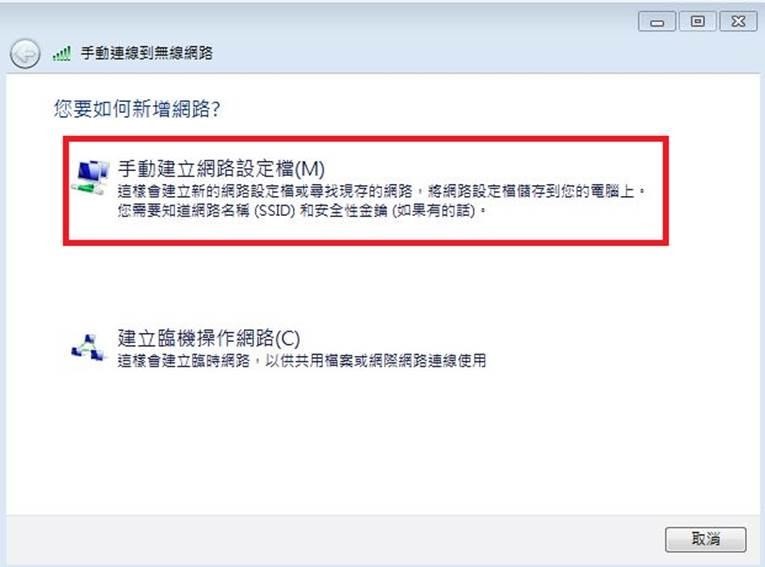
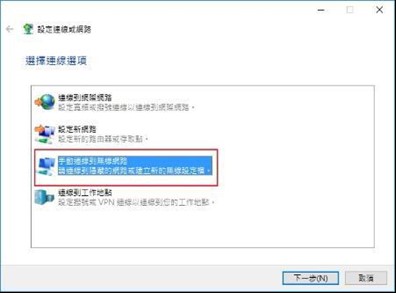
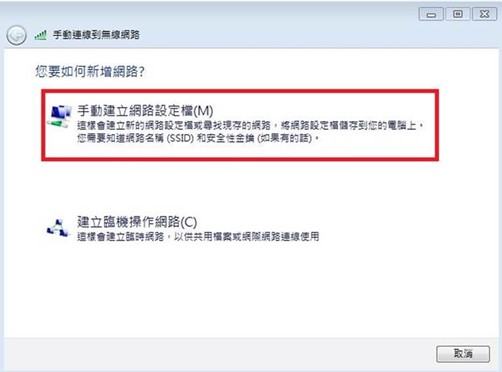
Step 3. Select "Manually create network profile".
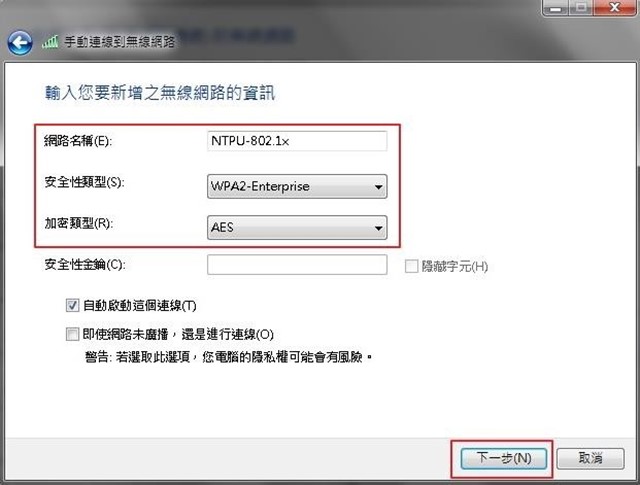
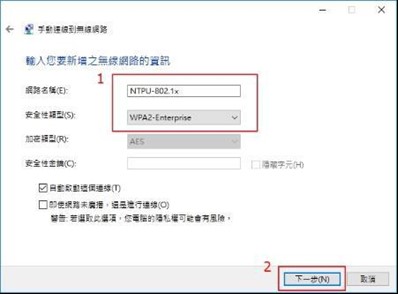
Step 4. Enter "NTPU-802.1x" for the network name, "WPA2-Enterprise" for the security type, "AES" for the encryption type, and finally
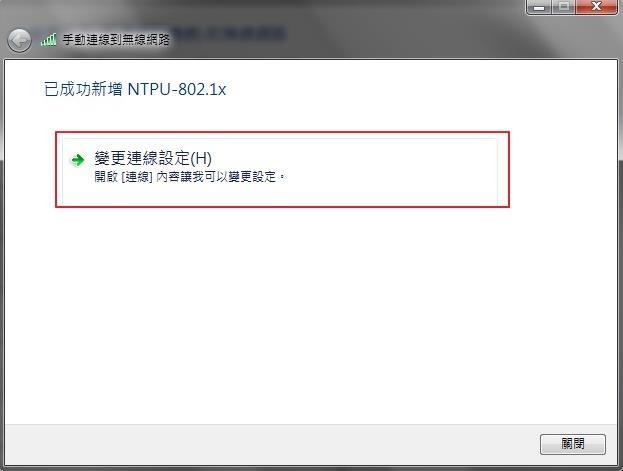
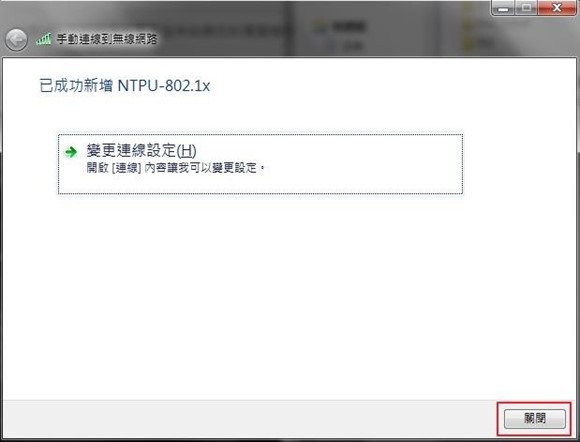
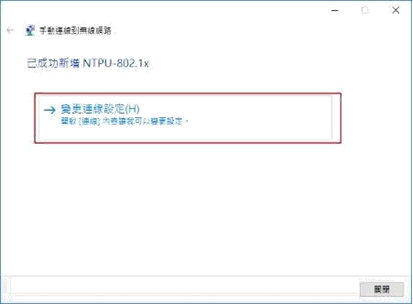
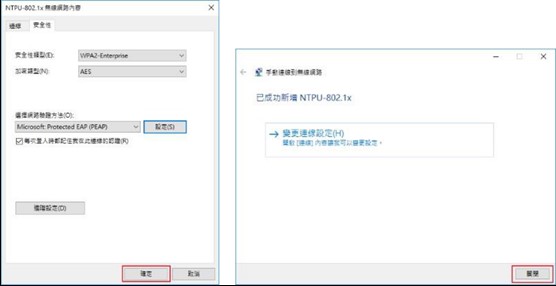
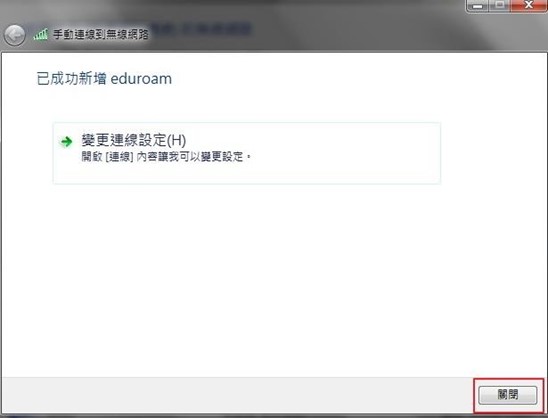
Step 5. A successful addition of the "NTPU-802.1x" screen , click "Change Connection Settings".
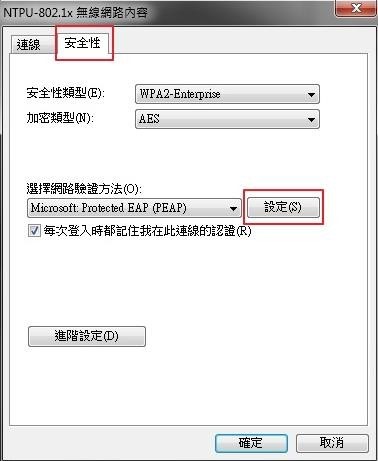
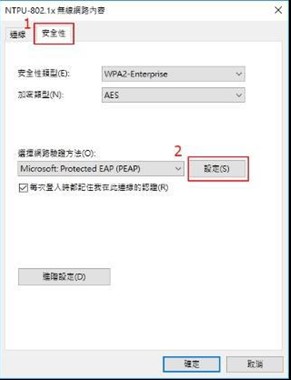
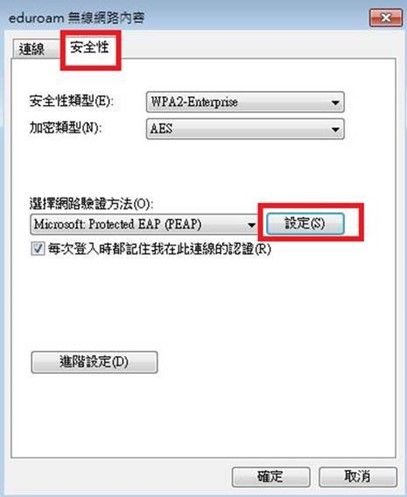
Step 6. Click on "Security" and click on "Settings".
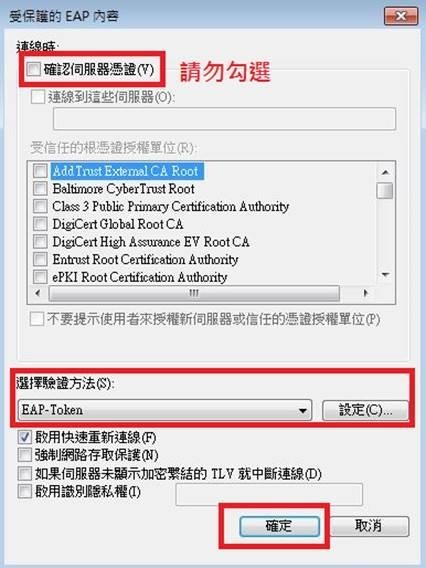
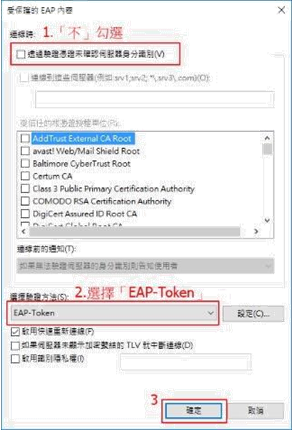
Step VII. Do not check "Confirm Server Credentials". Select the authentication method EAP-Token and press "OK".
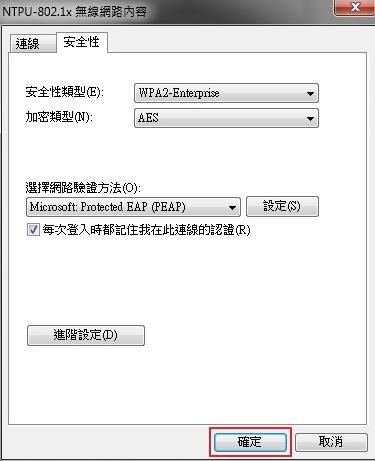
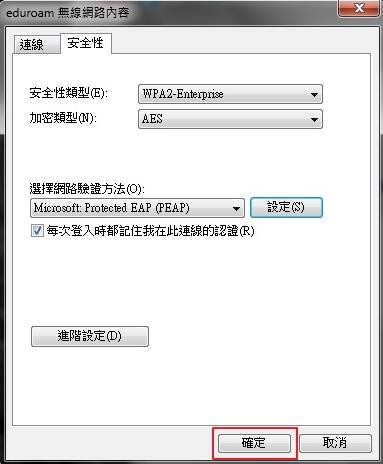
Step 8. Select "OK" and "Close" according to the following screen.
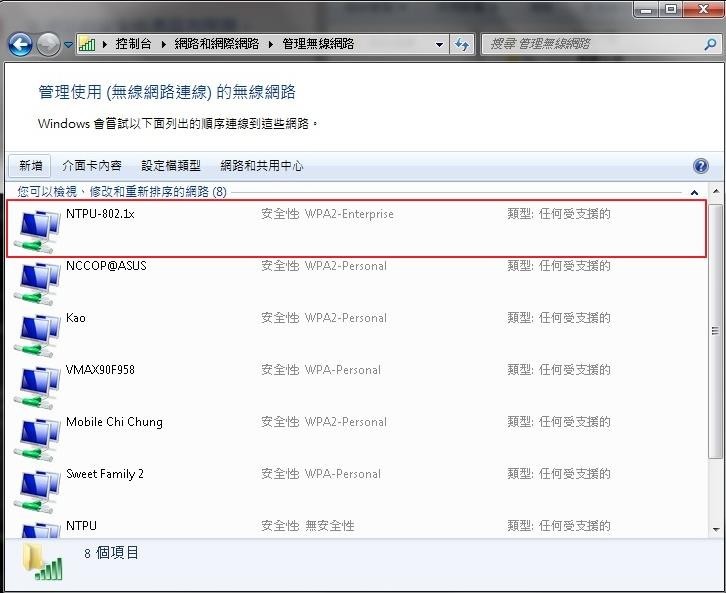
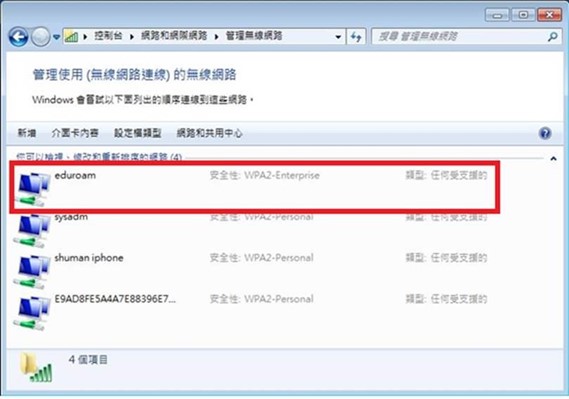
Step IX. In "Management Use (Wireless Network Connection)" In the Wireless Network window, you will find an additional "NTPU-802.1x" wireless base station name.
(5). Connection Test
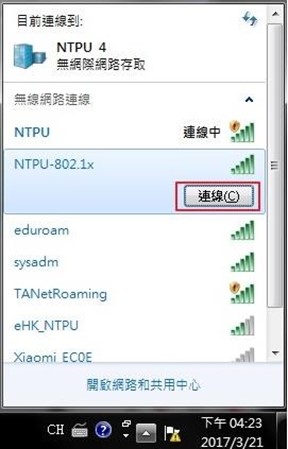
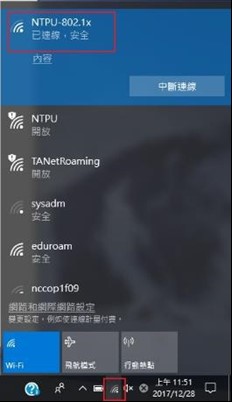
Step 1. Click the wireless network icon in the lower right corner of the desktop, select "NTPU-802.1x", and press Connect.
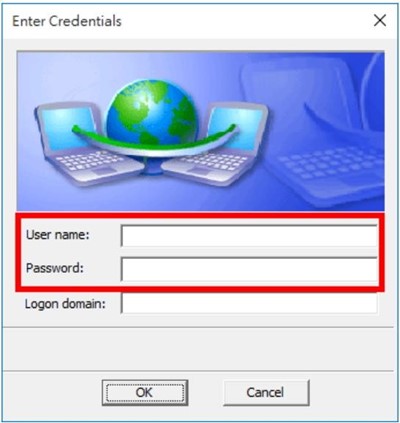
Step 2. The following login screen will appear, please enter your school email account and Password, Logon domain No need to enter, click OK, you can go online.
Student email account → s+ student number (no need to enter "@webmail.ntpu.edu.tw")
Staff → Account (no need to enter @mail.ntpu.edu.tw))
4. Instructions for connecting NTPU-802.1x to Windows 10
(1). The user must first check the version and bit size of the computer
Step 1. Console → System and Security → System
Step 2. Check the Windows version and system type as 32-bit operating system or 64-bit operating system
(2). Download the EAP-GTC installation file
(3). Install the EAP-GTC installation file
The following takes Windows 10, 64-bit operating system environment as an example.
Step 1. Download the EAP-GTC installation file (64-bit), and execute the file to install.
Step 2. After the installation file is executed, this screen appears, click "Next".
Step 3. Select "I accept the terms in the license agreement", and then click "Next".
Step 4. Select "Complete" and click "Next".
Step 5. Click "Install".
Step 6. The installation is successful, click "Finish".
Step 7. Select "Yes" and wait for the reboot to complete.
(4). Setting the wireless base station
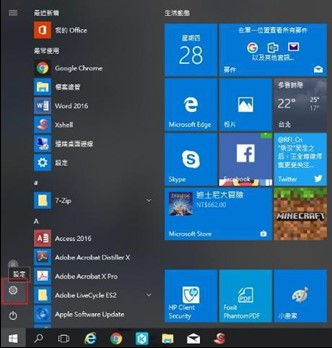
Step 1. Click "Start" in the lower left corner of the computer desktop → select "Settings".
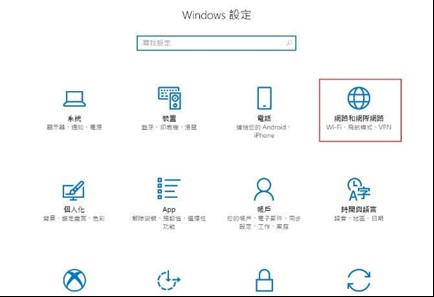
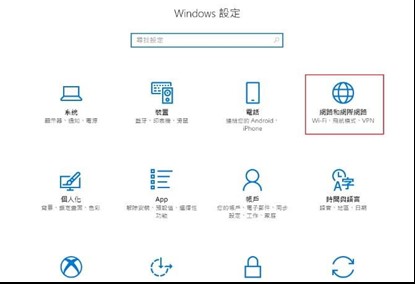
Step 2. Click "Network and Internet".
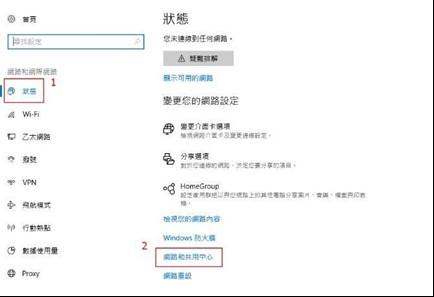
Step 3. Click "Status" → select "Network and Sharing Center".
Step 4. Click "Set up a new connection or network".
Step 5. Click "Manually connect to a wireless network".
Step 6. Please enter "NTPU-802.1x" for the network name, "WPA2-Enterprise" for the security type, and finally click "Next".
Step 7. Click "Change Connection Settings".
Step 8. Click the "Security" menu, and then click "Settings"
Step 9. Do not check "Verify server identity by verifying certificate", select "EAP-Token" as the authentication method, and then click "OK".
Step 10. Select “OK” and “Close” according to the following screen.
(5). Connection test
Step 1. Continue the above steps, the following login screen will appear at this time, please enter the school's email account and password, Logon domain does not need to be entered, click OK to access the Internet.
Student email account → s+student number (do not need to enter "@webmail.ntpu.edu.tw")
Faculty → Account (do not need to enter "@mail.ntpu.edu.tw")
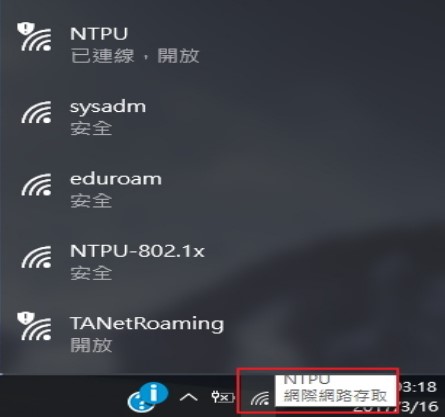
Step 2. Click the wireless network icon at the bottom left of the operating system desktop, and the wireless base station name will appear as NTPU-802.1x. Then click "Connect" to complete the connection setting.
5. Instructions for removing NTPU-802.1x from Windows system
The following takes Windows 10, 64-bit operating system environment as an example.
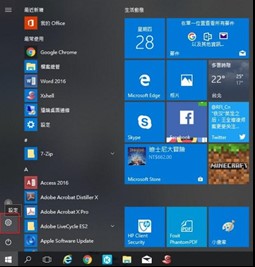
(1). Click "Start" in the lower left corner of the computer system desktop, and then click "Settings".
(2). Click "Network and Internet".
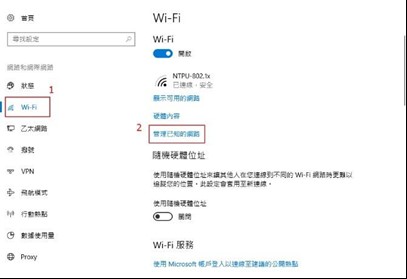
(3). Click "wi-fi" → "Manage Known Networks".
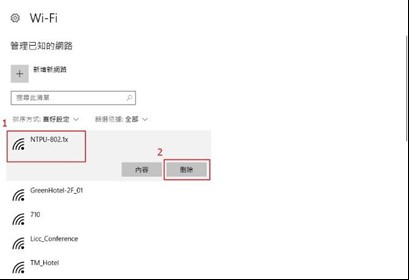
(4). Click "NTPU-802.1x", then click "Delete" to remove the setting.
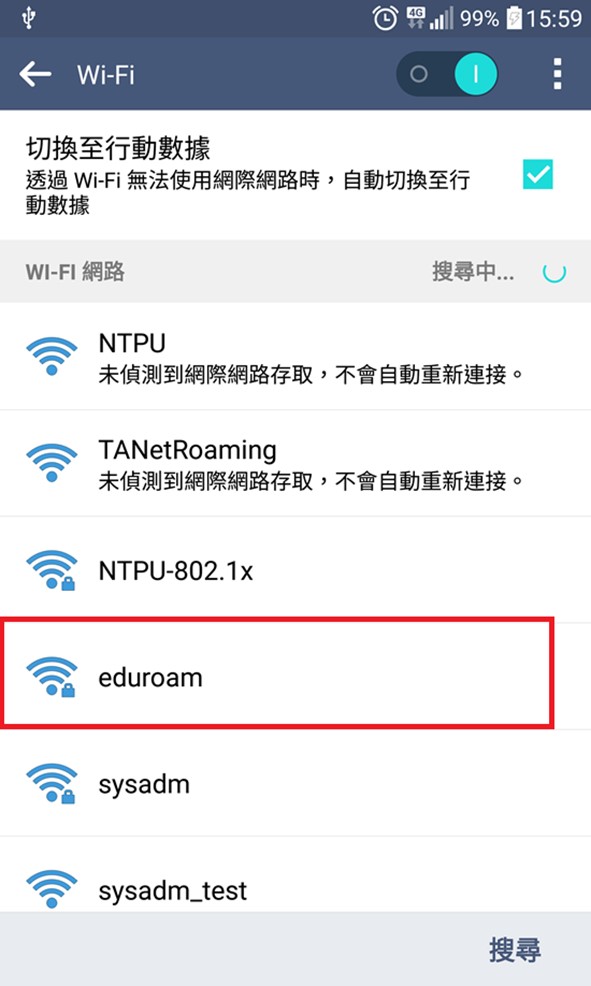
(3)use eduroam base station to encrypt the connection description
1. How to use eduroam on Android
Step 1. Open Settings→Turn on Wi-Fi and click eduroam
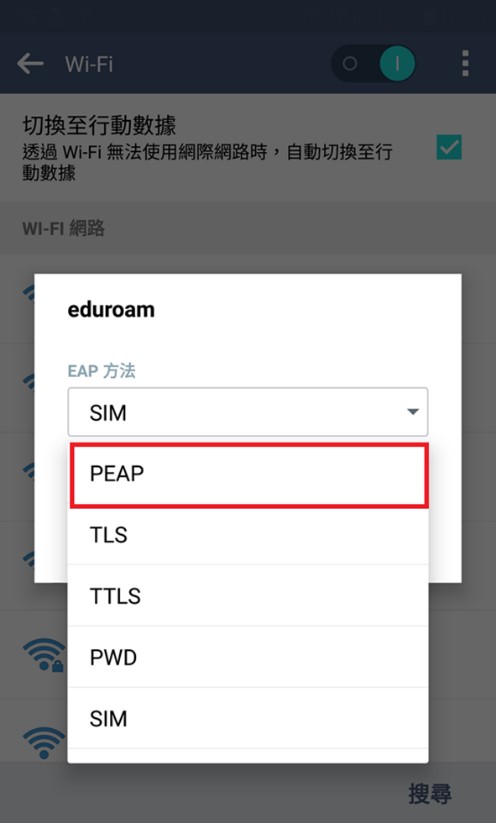
Step 2. EPA Method Selection PEAP
Step 3. Enter our school email account and password
Student Email Account → Account@webmail.ntpu.edu.tw
Faculty → Account@mail.ntpu.edu.tw
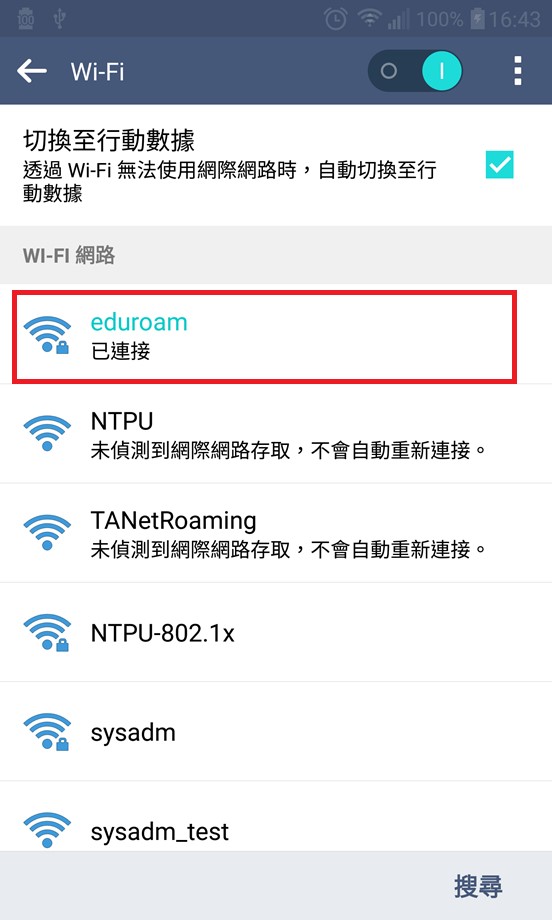
Step 4. Connected is displayed at the bottom of Eduroam, indicating that the connection is successful and you can access the Internet
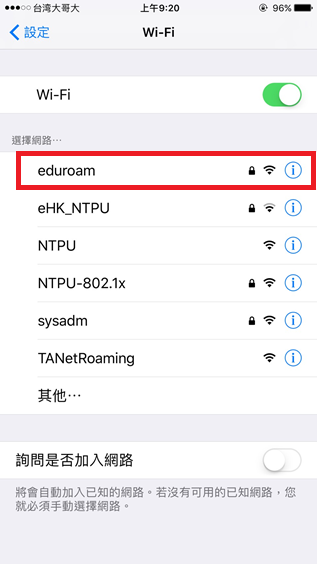
2. How to use eduroam on IOS
Step 1. Open Settings→Turn on Wi-Fi and click eduroam
Step 2. Enter our school email account and password
Student Email Account → Account@webmail.ntpu.edu.tw
Faculty → Account@mail.ntpu.edu.tw
Step 3. The certificate message appears, click Trust
Step 4. After completing the authentication, you can go online
3. Instructions for connecting eduroam to Windows system
(1). The user must first check the version and bit size of the computer
Step 1. Console → System and Security → System
Step 2. Check the Windows version and system type as 32-bit operating system or 64-bit operating system
(2). Download the EAP-GTC installation file
(3). Install the EAP-GTC installation file
The following takes Windows 7, 32-bit operating system environment as an example.
Step 1. Download and install "EAP-GTC-x86-Win7".

Step 2. After the installation file is executed, this screen appears, click "Next".
Step 3. Select "I accept the terms in the license agreement", and then click "Next".

Step 4. Select "Complete" and click "Next".
Step 5. Click "Install".
Step 6. When the installation is successful, click "Finish".
Step 7. Select "Yes" and wait until the reboot is complete.
(4). Setting the wireless base station
Step 1. Go to "Control Panel" → "Network and Internet" → "Network and Sharing Center", and click "Manage Wireless Networks".

Step 2. Click "Add".
Step 3. Select "Manually create network profile".
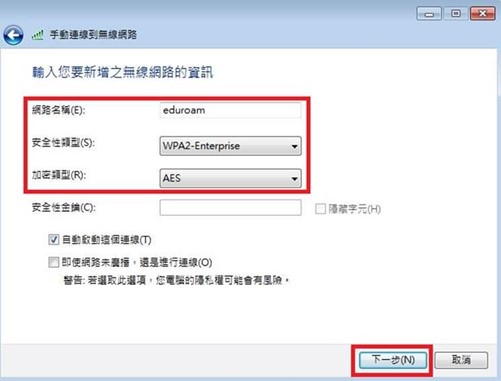
Step 4. Enter "eduroam" for the network name, "WPA2-Enterprise" for the security type, "AES" for the encryption type, and finally click "Next".
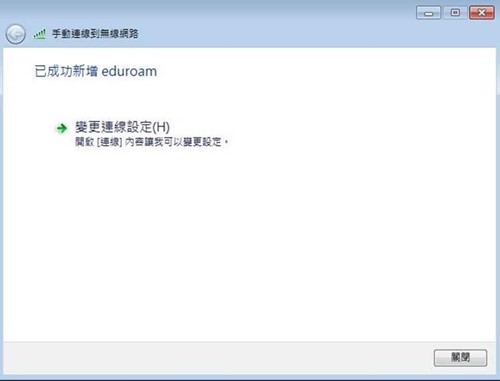
Step 5. The “eduroam” successfully added screen appears, click “Change Connection Settings”.
Step 6. Click on "Security" and click on " set up".
Step 7. Do not check "Confirm Server Credentials" and select the authentication method EAP. -Token, then press "OK".

Step 8. Select "OK" and "Close" according to the following screen.
Step IX. "Manage the wireless network using (wireless network connection)" In the window, you will find an additional wireless base station name for "eduroam".
(5). Connection test
Step 3. Click on the desktop right In the lower corner wireless network icon, select "eduroam" and press Connect.
Step 4. The following login screen will appear, please enter your school email account and Password, Logon domain No need to enter, click OK, you can go online.
Student email account → s+ student number (no need to enter "@webmail.ntpu.edu.tw")
Staff → Account (no need to enter @mail.ntpu.edu.tw)) p>
5. Off-campus roaming method
(1), domestic
If you find the TANetRoaming signal from our school, staff and students, you can use our school's email account and password to roam online. However, the full name of the account should be entered, for example: s10012345@webmail.ntpu.edu.tw, or abc@mail.ntpu.edu.tw.
(2), abroad
If the faculty, staff and students of our school go to foreign units, if they find the eduroam signal, they can use the school's email account and password to roam online. However, the full name of the account should be entered, for example: s10012345@webmail.ntpu.edu.tw, or abc@mail.ntpu.edu.tw.
※Information security reminder: Since the name of the SSID base station can be set freely, in order to avoid the account password being stolen, please confirm that the source of the SSID is reliable, and use it with caution to prevent the account password from being leaked.
(六) Frequently Asked Questions
(1), Unable to connect
1. Make sure the wireless network card is not turned off
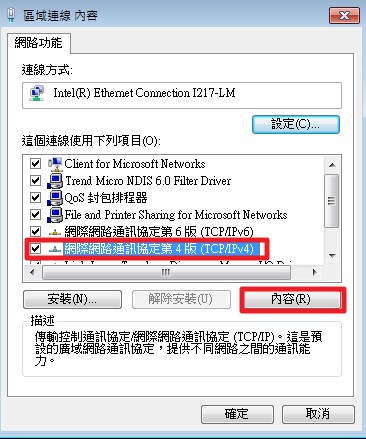
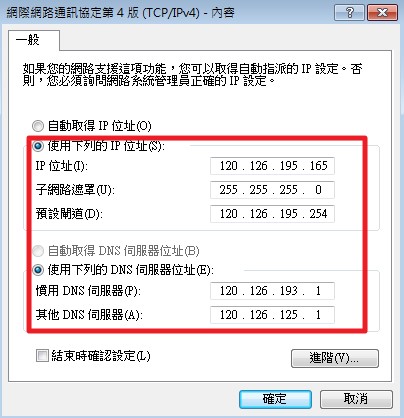
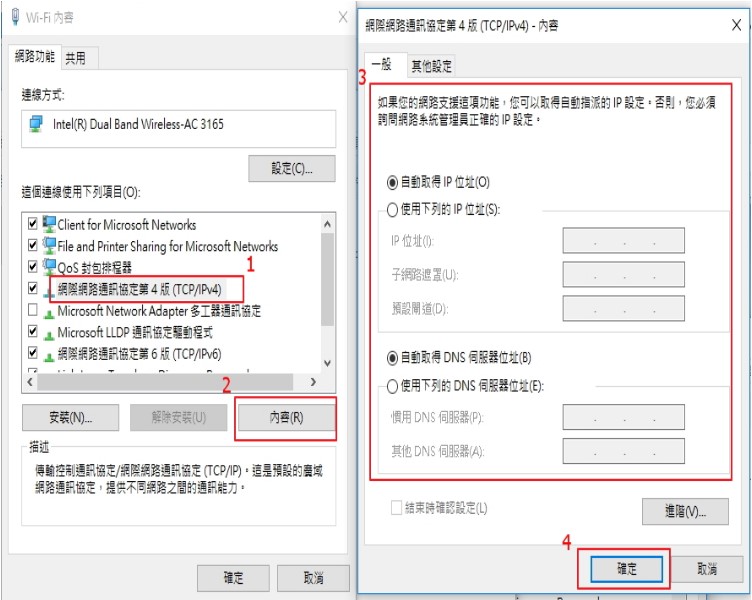
2. Please make sure that the wireless network card is not set with a fixed IP address.
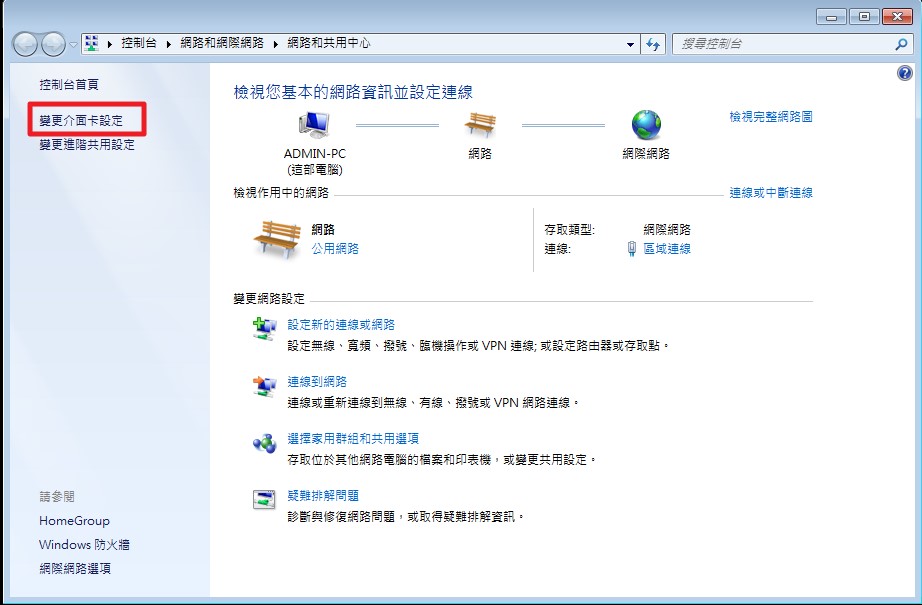
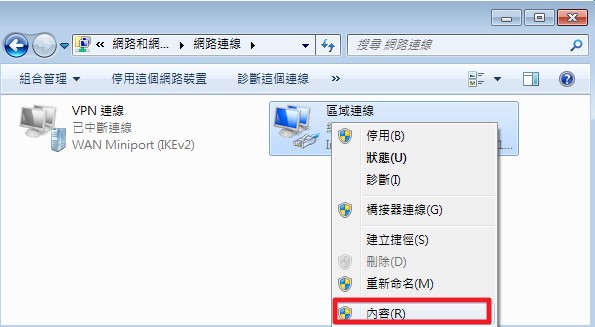
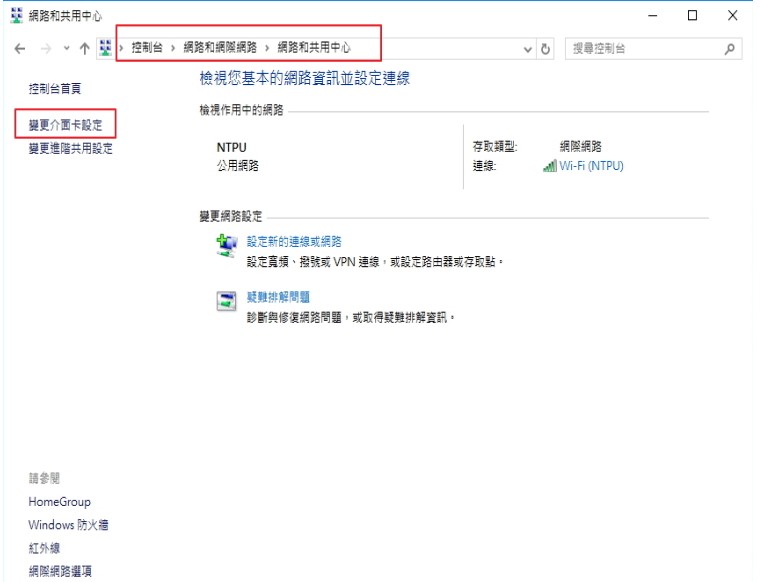
(1). Click the path: Control Panel -> Network and Internet -> Network and Sharing Center -> Change Interface Card Settings.
(2). Click "Wi-Fi Wireless Network Card", right-click the icon, and then click "Content".
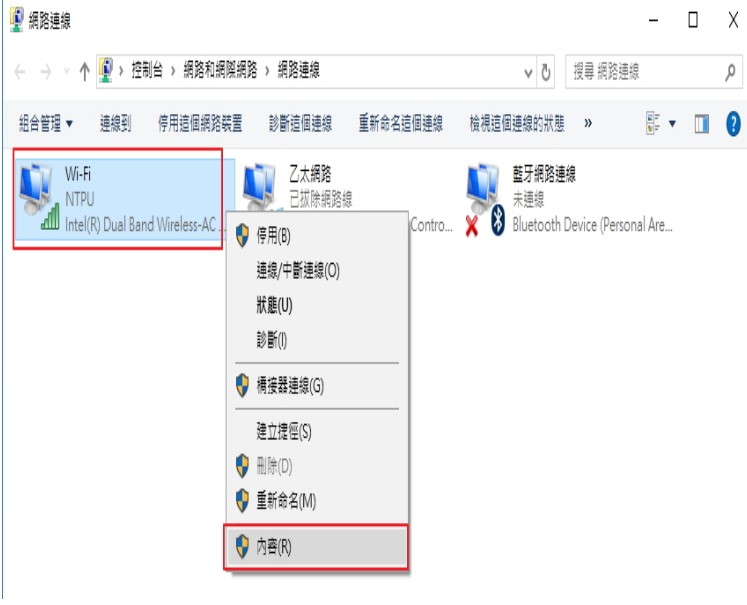
(3). Make sure that the wireless network card is not set with a fixed IP address.
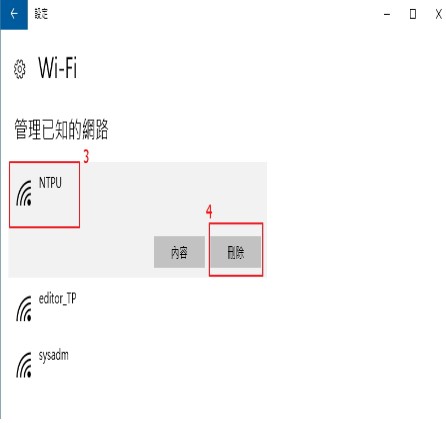
(2) The method of clearing the wireless network password record in Windows. (The following uses Windows10 as an example)
1. Click "Network Settings" in wifi
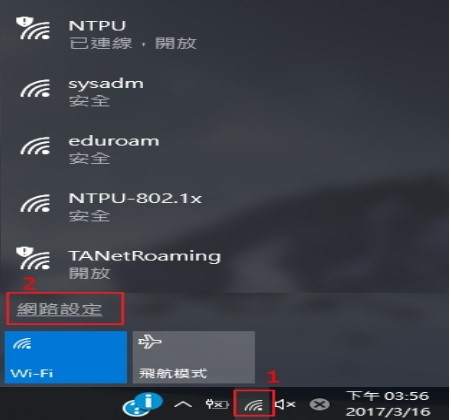
2. Click "Wi-Fi", then click "Manage Known Networks"
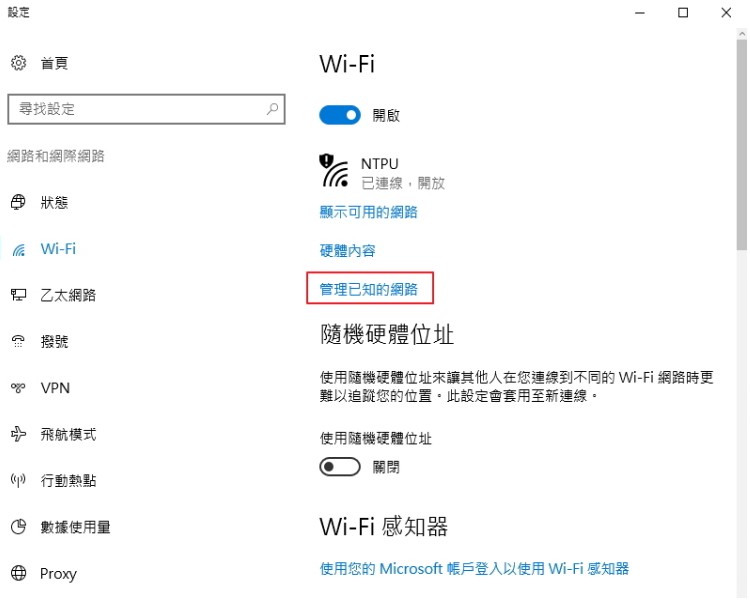
3. After selecting the SSID to delete the record, select Delete to complete
7. Contact us for wireless network problems:
Contact Number:
(02)8674-1111(extension 68221)(Sanxia Campus)
(02)2502-4654(extension 18096)(Taipei Campus)